Only a 10 minute walk from the carpark at the top of Old Farm Road behind the Cascade Brewery, is a hidden gem – that’s sadly no longer a secret. On the way, I stopped to photograph some fungi that caught my eye.


This little waterfall seems to have become my testing spot for camera’s, I think this is the 5th one I’ve taken there now for a shoot. Aside from it’s so pretty and I love spending time there listening to the constant shhhhhh of water, it can provide somewhat of a photographic challenge.
Depending on the light, on a sunny afternoon such as this, it has very broad contrast with heavy shadows – white flowing water and bright sky versus deep folds and undercuts in the rock cliff, a great opportunity to see how a camera handles a wide dynamic range.

The new OM-1 didn’t disappoint with the versatile Olympus 12-40mm F2.8 PRO attached. This is the first time I’ve really appreciated the higher resolution of the flip out LCD screen, so clear you could tell the resulting photos would be good. Normally I’m not so sure until I see them on a large PC screen.
These images have been edited in OM Workspace, which I’m still getting used to instead of editing RAW files in Photoshop. It has less features than Photoshop’s RAW editor, but seems to handle noise reduction and sharpness better.

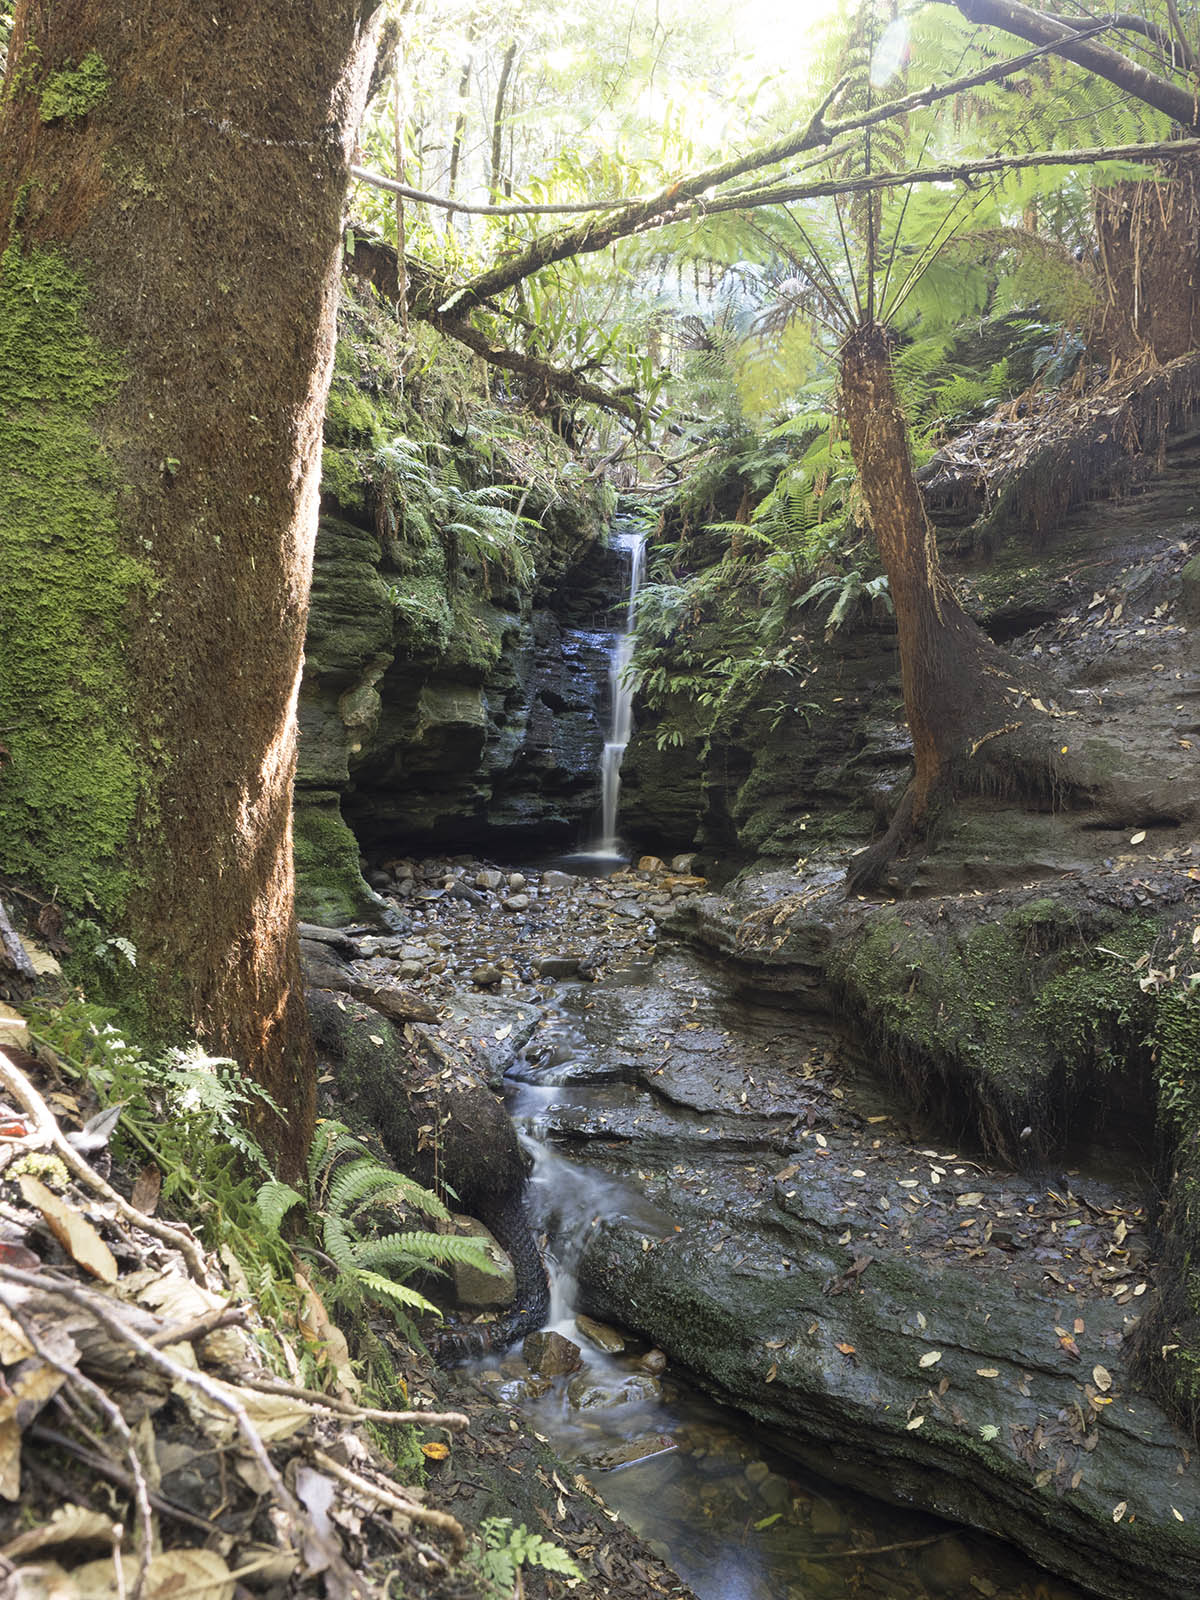
Recovery of blown out highlights is very impressive, but heavy shadows, not so much. I have always tended to under expose my photos by a stop or two to preserve the highlights, a trait I picked up using Nikon and Sony cameras. I have to learn to trust the OM-1 exposure more. The shot below shows where the sun is in the afternoon. Most of the other shot’s I shaded the lens with my hand as I don’t use lens-hoods.

I did take a couple of 50MP Hi-res shots, but I’d like to return and try out the built in ND filter and HDR mode which I didn’t think about at the time.
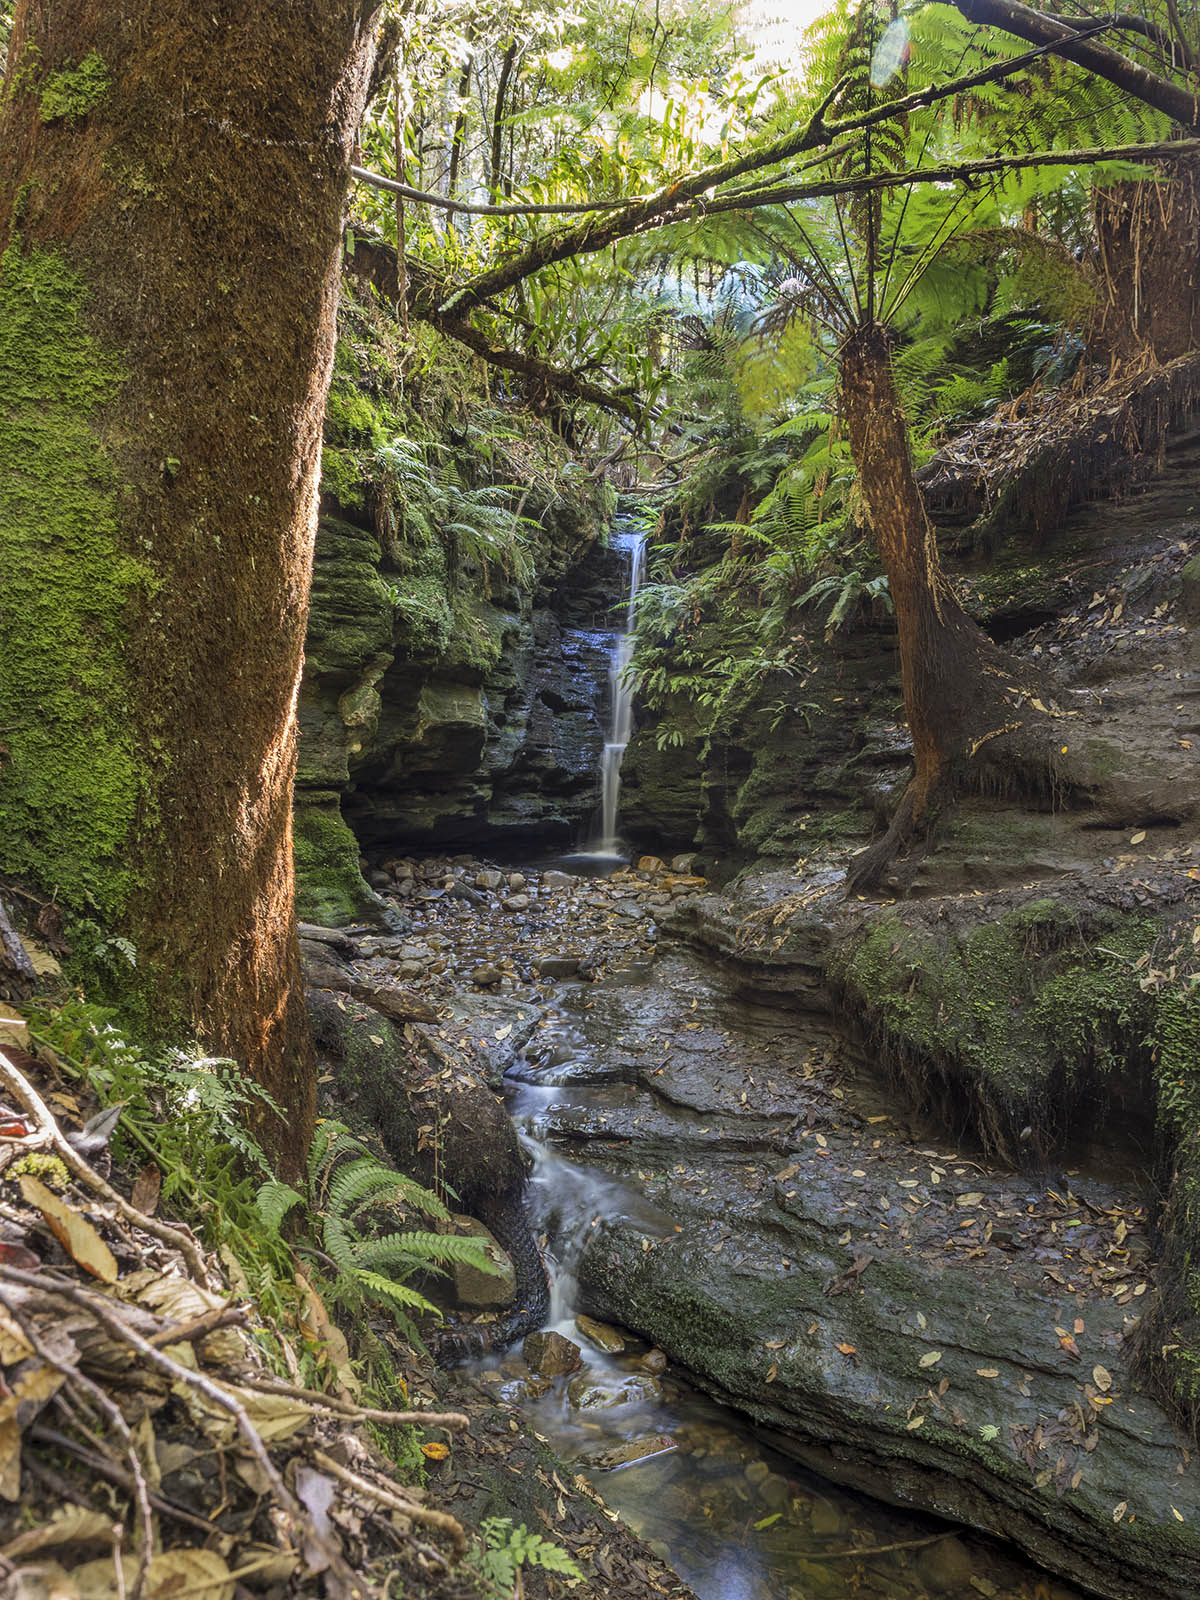
Below, Myrtle Gully Falls, not very far from the place that used to be a secret. Shhhhhhh.

POST EDIT: After the comment from David Below, it got me thinking … and experimenting. The above images are all edited in OM Workspace, I wondered if Photoshop would do a better job of shadow and highlight recovery. I downloaded the latest version of Adobe DNG Converter which to my surprise, converted the RAW files from the OM-1 so I could edit them in Photoshop CS6 (the last non-subscription version from 2012).
I chose the most over-exposed shot from the day to play with, firstly in OM Workspace …


You can see above, OM Workspace has recovered some detail in the highlights, not so much in the shadows, but completely messes up detail elsewhere and flattened the colours so it’s unusable when really pushed. Let’s give Photoshop a try …

Incredible difference! I’ve done nothing else but drag the highlights, shadows, Blacks and Whites sliders for extreme recovery. It’s ended up with a flat but detailed image, close to ready for further editing in Photoshop …

In the final version above, I’ve used the burn tool to selectively darken shadow areas around the sky and to the left and right of the image that were grey rather than black and the dodge tool to lighten the waterfall and foreground water to bring them out, applied some subtle sharpening.
Conclusion: While OM Workspace has a slightly better handle on dealing with noise in an Olympus (or OM System) image, it falls well short when it comes to data recovery in highlights and shadows. Because I’ve used Photoshop RAW for years, I’ve played and learnt how to effectively deal with the noise anyway, it looks like I will revert back to my original post-processing workflow. Thanks David for prompting me to experiment 😀
Thanks for visiting one of my favourite tranquil places 🙂

About under and over exposing, I found with my Nikon is that it did not like to be underexposed – especially at higher ISOs. So I have it set with the ‘preserve highlight details’ function set, and exposure compensation to +1. That method obeys the ‘expose to the right’ dictum that I always had trouble with. I can’t be looking at the histogram all the time, but since I put in those settings, the camera seems to get enough light onto the sensor to bring out what the camera can do. Basically, what I am wondering is whether if you increase exposure to deal with the blacks, whether it might be still possible to pull back the highlights?
LikeLiked by 1 person
Thanks for your comment David, you got me thinking and experimenting … I’ve just compared OM Workspace to Photoshop CS6’s handling of RAW files – and updated this post with the results. Wonder no more 😀 I really appreciate the little push to try this.
LikeLike
First off, I love waterfalls, so this post was fun. I also enjoyed your testing and comparison editing. Well done!
LikeLiked by 1 person
Thanks Dan, it proved to be a worthwhile exercise!
LikeLiked by 1 person
What a magickal place! Fascinating experiments. I obviously need to experiment more.
LikeLiked by 1 person
Thank you, I love experimenting, it’s a great way to learn. It also teaches you about accepting failures and moving on.
LikeLiked by 1 person
Did you put the eyes on that gray seal’s head in the second picture?
Beautiful photos, again!
LikeLiked by 1 person
Ha! No, they are fungi tears 😭
LikeLiked by 1 person
Seriously? I thought either you planted them there or they’re slugs.
LikeLiked by 1 person
It was like they had little cuts in them ouzing sap. I’d never seen it before!
LikeLiked by 1 person
It made an amazing “mystery” photo,
LikeLiked by 1 person
What a beautiful spot. I hope all visitors will respect this place and ‘leave no trace’! Living in a tourist location, a lot of local feel the same and try to keep some fragile spots a secret. Usually it doesn’t take very long for others to find out … most are respectful but some are not.
LikeLiked by 1 person
One person on Facebook giving directions was all it took here. It took me nearly two years before that to find it after I heard rumours, which was the fun part. You can see just some of the muddy track to the right in the wide shots.
LikeLike
Lovely secret waterfall. Noise is annoying but I cannot see any of it unless I have original, large files. I will have to trust you on that. Unlike David, I always use a -1 exposure compensation on my old Nikon to avoid highlight clipping. But when I am shooting wildlife and shutter speed is important, I overexpose to get less noise from the high ISO.
LikeLiked by 1 person
We have similar thoughts with exposure Alessandra. The Olympus has a graduation curve for adjusting highlight and shadow control (some other brands may have this too). I’ve set the OM-1 to +2 for the shadows and -2 for the highlights. This reduces contrast somewhat but allows for better shadow and highlight recovery in post on jpegs, particularly for in camera focus stacking for me where the final stacked image is only a jpeg.
LikeLike